
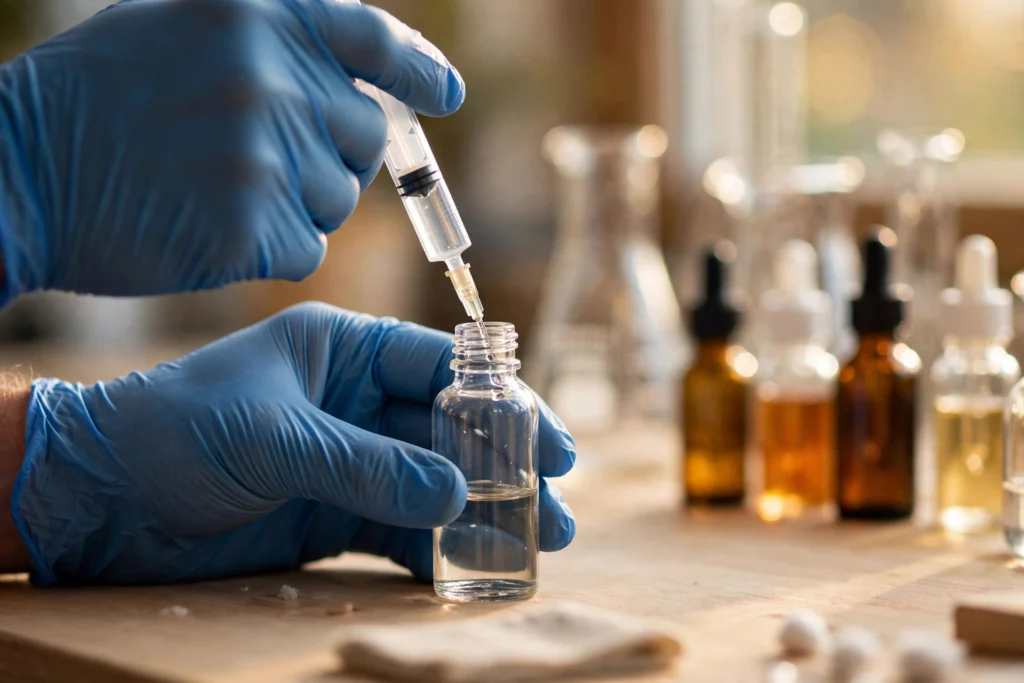
33 Proven Steps: The Ultimate DIY Vape Juice Guide for First-Time Mixers
There is something deeply satisfying about vaping a flavor you created yourself. DIY vape juice turns vaping from a purchase into a craft. Instead of choosing from someone else’s menu, you become the chef, blending flavors, tuning nicotine strength, and dialing in the exact vapor production you want.
This ultimate guide to DIY vape juice walks you through everything in 33 proven steps, from gathering ingredients to steeping your first finished batch. If you have never mixed before, start here. By the end, you will have the knowledge and confidence to make DIY vape juice safely at home.
A quick note before we begin: DIY vape juice is for adults of legal vaping age only. Nicotine is addictive, and concentrated nicotine must be handled with care. The safety section below is not optional reading. Please read it fully before you mix anything.
Why Make DIY Vape Juice?
Before we touch a bottle, let us talk about why so many vapers start making DIY vape juice.
Complete Creative Control
Store shelves limit you to what brands decide to sell. With DIY vape juice, the flavor combinations are limited only by your imagination and your concentrate collection. Want a peach cobbler with a hint of mint? A tobacco blended with caramel and a whisper of coffee? You can build it.
Serious Cost Savings
E-liquid is one of the biggest ongoing costs in vaping. Making DIY vape juice usually costs a fraction of the price per milliliter compared to premium pre-made bottles. The ingredients stretch far: a single bottle of flavor concentrate flavors many batches, and base liquids are inexpensive in larger sizes.
Tailored Nicotine Strength
Pre-made juices come in fixed strengths. DIY vape juice lets you fine-tune nicotine to your exact preference, including levels between the standard options or a gradual step-down plan if you are reducing over time.
Fresher Juice on Demand
You mix what you need, when you need it. No more vaping a bottle that sat in a warehouse for months. Your DIY vape juice is as fresh as the day you mixed it.
The Hobby Factor
Many mixers will tell you the process itself is half the fun. Experimenting, tasting, tweaking, and finally nailing a recipe you love is genuinely rewarding. DIY vape juice turns a habit into a hobby.
What You Need to Make DIY Vape Juice
Gather your supplies before you start. Good preparation prevents mid-mix surprises.
Core Ingredients for DIY Vape Juice
Propylene Glycol (PG). PG is a thin, nearly tasteless liquid that carries flavor well and provides throat hit. It is one half of the base in almost every DIY vape juice recipe.
Vegetable Glycerin (VG). VG is thicker and slightly sweet. It produces dense vapor clouds and softens the throat hit. The PG/VG balance shapes the whole character of your DIY vape juice.
Flavor concentrates. These are highly concentrated food-grade flavorings made for vaping. They come in hundreds of varieties: fruits, desserts, beverages, tobaccos, mints, and candies. Always buy concentrates intended for e-liquid use, never cooking oils or unknown extracts.
Nicotine (optional). Liquid nicotine is available in different strengths and in freebase or salt form. It is the ingredient that demands the most respect. More on safe handling below.
Distilled water (optional). A few mixers add tiny amounts to thin very thick blends. Most beginners can skip this entirely.
Essential Tools
Syringes or pipettes. Accurate measurement is the foundation of repeatable recipes. Get a set of syringes in several sizes with blunt-tip needles for safe, precise dispensing.
Mixing bottles. Use clean bottles with childproof caps, preferably with measurement markings. Many mixers prefer soft plastic squeeze bottles for easy dispensing.
Disposable gloves. Wear them whenever you handle nicotine. No exceptions.
Safety glasses. An extra layer of protection when working with concentrated nicotine.
Labels and a marker. Label every bottle with the recipe name, date, nicotine strength, and PG/VG ratio. Unlabeled bottles are how mistakes happen.
A scale (optional but recommended). Many experienced mixers measure by weight instead of volume because it is faster and more precise. A small digital scale that reads to 0.01 grams works well.
Paper towels and a tray. Mix over a tray lined with paper towels. Spills happen, and containing them keeps your workspace clean.
Understanding PG/VG Ratios in DIY Vape Juice
The PG/VG ratio is one of the most important decisions in any DIY vape juice recipe. It affects throat hit, flavor intensity, vapor production, and whether your device can wick the liquid properly.
50/50 PG/VG
A balanced blend that works beautifully in pod systems and mouth-to-lung tanks. The thinner liquid wicks easily in small coils, flavor comes through clearly, and the throat hit is noticeable but smooth. If you are new to DIY vape juice and you vape pods, start here.
70/30 VG/PG
A popular middle ground for sub-ohm tanks. You get denser vapor than 50/50 with flavor that still shines. Many all-day-vape recipes use this ratio because it balances clouds and taste.
80/20 VG/PG and Max VG
High-VG blends are for cloud chasers and direct-to-lung devices. Vapor production is thick and billowy, and the inhale feels very smooth. The trade-off is slightly muted flavor and thicker liquid that demands coils with large wicking ports. Do not use max-VG DIY vape juice in small pod systems.
Matching Ratio to Device
This rule saves beginners the most frustration: thin juice for small coils, thick juice for big coils. When your DIY vape juice will not wick properly, the ratio is the first thing to check.
DIY Vape Juice Safety: Read This First
Safety is the foundation everything else rests on. These rules are simple, and following them keeps DIY vape juice fun instead of risky.
Handle Nicotine With Respect
Concentrated nicotine can be harmful if swallowed or absorbed through skin in quantity. Always wear gloves when handling it. If nicotine contacts your skin, wash the area thoroughly with soap and water right away. If you feel dizzy or nauseous after handling nicotine, stop, ventilate the area, and seek fresh air. Keep the number for poison control handy, just in case.
Store Everything Securely
Keep nicotine and all mixing supplies locked away from children and pets. Use childproof bottles. Store liquids in a cool, dark place. A locked box or a high cabinet works well. Treat your DIY vape juice station the way you would treat any area with chemicals: organized, labeled, and off-limits to kids.
Keep It Clean
Work on a clean surface with clean tools. Rinse syringes between ingredients or use separate ones. Contamination will not usually make juice dangerous, but it will ruin flavors and waste your time.
Measure, Do Not Guess
Nicotine strength is the one place where precision truly matters. Use syringes or a scale, double-check your math, and consider an online e-liquid calculator to verify your numbers. Guessing with nicotine is never acceptable.
Label Every Bottle
Write the recipe name, mixing date, nicotine strength, and PG/VG ratio on every finished bottle. This protects you and anyone else in your household from picking up the wrong bottle.
3 Simple DIY Vape Juice Recipes for Beginners
Start with small 30-milliliter test batches. These beginner-friendly recipes use common concentrates and forgiving ratios.
Recipe 1: Simple Strawberry Cloud
This bright, simple fruit mix is a perfect first DIY vape juice project.
Ingredients for 30 ml:
- VG and PG to reach a 70/30 ratio
- Strawberry flavor concentrate at 8 percent
- Sweet strawberry or dragonfruit concentrate at 4 percent
- Nicotine to your preferred strength (optional)
Steps: 1. Add your nicotine to the empty bottle first, measuring carefully. 2. Add the PG portion, then the flavor concentrates. 3. Fill to the top with VG. 4. Cap tightly and shake vigorously for a full minute. 5. Label the bottle and let it rest for two to three days, shaking daily.
Recipe 2: Smooth Vanilla Cream
A mellow dessert mix that rewards a little patience.
Ingredients for 30 ml:
- VG and PG to reach a 70/30 ratio
- Vanilla bean or French vanilla concentrate at 6 percent
- Sweet cream concentrate at 4 percent
- Nicotine to your preferred strength (optional)
Steps: 1. Measure nicotine into the bottle first. 2. Add PG, then both concentrates. 3. Top up with VG and shake hard for a full minute. 4. Label the bottle. This one improves noticeably after one to two weeks of steeping, so make it ahead and be patient.
Recipe 3: Cool Mint Refresher
A crisp, clean vape that needs almost no steeping.
Ingredients for 30 ml:
- VG and PG to reach a 50/50 ratio
- Peppermint concentrate at 4 percent
- Menthol or koolada concentrate at 2 percent
- Nicotine to your preferred strength (optional)
Steps: 1. Add nicotine first, measured precisely. 2. Add PG and the concentrates. 3. Fill with VG, cap, and shake well. 4. Label and rest for one day. Mint mixes are usually enjoyable almost immediately.
These are starting points, not commandments. Adjust percentages in small steps until each recipe tastes right to you. That adjusting process is the heart of DIY vape juice.
How to Mix Your First Batch of DIY Vape Juice
Here is the full workflow, start to finish.
Step 1: Set Up Your Station
Clear a table, lay down paper towels or a tray, and put on your gloves. Arrange your ingredients and tools so everything is within reach. Good setup prevents spills and forgotten steps.
Step 2: Choose Your Recipe
Pick one of the beginner recipes above or a well-reviewed recipe from a trusted mixing community. Write down the exact percentages before you start pouring.
Step 3: Calculate Your Amounts
Use an e-liquid calculator to convert percentages into milliliters or grams for your batch size. Verify the nicotine math twice. This takes two minutes and prevents the most common beginner error.
Step 4: Add Nicotine First
Measure your nicotine carefully with a dedicated syringe and add it to the empty bottle. Adding it first means every later addition dilutes it toward the target, and you handle the concentrated form only once.
Step 5: Add PG
Pour in the PG portion. PG is thin and mixes easily, helping distribute what follows.
Step 6: Add Flavor Concentrates
Add each concentrate with its own clean syringe or by weight on your scale. Work slowly and double-check each addition against your recipe sheet.
Step 7: Add VG Last
VG is thick and fills the remaining space. It also helps push lighter ingredients together as you shake.
Step 8: Cap and Shake
Seal the bottle tightly and shake vigorously for at least a full minute. You want the liquid fully homogenized, with no visible separation or streaks.
Step 9: Label Immediately
Write the recipe name, date, nicotine strength, PG/VG ratio, and any notes on the label. Do this before you set the bottle down, while the details are fresh.
Step 10: Steep if Needed
Fruit and mint mixes may be ready in a day or two. Creams and tobaccos improve over one to two weeks in a cool, dark place. Shake steeping bottles daily.
Steeping Your DIY Vape Juice
Steeping lets flavors meld and harsh edges soften. Here is what to expect by profile.
Fruits and beverages usually need only one to three days. Mints and menthols are often good right away. Bakeries and creams typically need one to two weeks. Tobaccos can take two weeks or more to fully develop.
There is no single right steep time, only what tastes best to you. Taste your DIY vape juice at intervals and keep notes. Over time you will learn exactly how long each of your recipes needs.
Speed-steeping tricks like warm water baths exist, but patience gives the most reliable Results. Make your next batch before you run out of the current one, and steeping never feels like waiting.
Common Beginner Mistakes With DIY Vape Juice
Adding Too Much Flavor
The most common rookie error. More concentrate does not mean more flavor; beyond a point, mixes taste chemical, perfumey, or strangely muted. Start at the low end of recommended percentages and increase slowly.
Skipping the Steep
Vaping a cream recipe the hour you mixed it and declaring it bad is unfair to the recipe. Give complex flavors the time they need before judging.
Poor Nicotine Math
Always verify your nicotine calculations. An e-liquid calculator removes the guesswork. When in doubt, mix a smaller test batch first.
Dirty Equipment
Old flavor residue in a syringe will ghost into your new recipe. Rinse tools between uses or dedicate syringes to specific ingredients.
No Notes
Mixing without writing anything down means your best accident can never be repeated. Keep a simple log: recipe, date, percentages, steep time, and tasting notes.
Impatience With Progress
Your first few batches may be just okay. That is normal. Every experienced mixer started with mediocre juice. The learning curve is short, and it climbs fast.
Storing Your DIY Vape Juice and Supplies
Finished DIY vape juice keeps best in a cool, dark place with caps tight. A drawer or cabinet away from heat works well. Most mixes stay good for many months; nicotine-containing juice may darken gradually, which is normal oxidation.
Store concentrated nicotine in the freezer for long-term freshness, in a clearly labeled, childproof bottle inside a sealed bag. Keep it away from food items and make sure everyone in the household knows what it is.
Flavor concentrates last a long time when stored cool and dark. Check old concentrates for off smells before using them in a big batch.
Scaling Up: From Test Batches to All-Day Recipes
Once a test batch wins your heart, it is time to scale it into a full bottle you can vape daily.
Verify the Recipe First
Vape the entire test batch before committing to a large mix. A recipe that tastes great for one tank sometimes wears out its welcome over a full day. Make sure you genuinely enjoy it as an all-day vape, not just as a novelty.
Scale Percentages, Not Just Volumes
Scaling is simple math: keep every percentage identical and multiply the total volume. If your 30-milliliter test used 8 percent strawberry, your 120-milliliter batch uses 8 percent strawberry too. An e-liquid calculator handles the arithmetic, so you never have to do it by hand.
Mix Large Batches in Stages
For big bottles, add ingredients in the same order as small batches: nicotine first, then PG, then concentrates, then VG. Shake longer than you think necessary. Thick VG needs real agitation to blend fully in large volumes.
Keep a Master Recipe File
Promote your winners to a master list with exact percentages, steep times, and tasting notes. This becomes your personal cookbook. Many mixers keep it in a notes app so it is always at hand when supplies run low.
Joining the DIY Community
One of the best parts of DIY vape juice is the community around it.
Learn From Shared Recipes
Mixing forums and recipe sites host thousands of rated recipes with detailed notes. Study a few top-rated recipes in a flavor family you like. Notice the typical percentage ranges and the way mixers layer a main note with supporting accents. This pattern recognition speeds up your learning enormously.
Share Your Own Work
When you create something you love, share it. Post the recipe with your notes on what worked and what you changed along the way. Feedback from other mixers will sharpen your skills, and you might help a beginner the way others helped you.
Ask Questions
Every experienced mixer remembers being confused by their first steep, their first harsh batch, or their first math mistake. Ask questions freely. The DIY community is famously generous with newcomers who show they have done the basic reading.
Frequently Asked Questions About DIY Vape Juice
Is making DIY vape juice legal?
For adults of legal vaping age, mixing your own e-liquid for personal use is generally permitted. Regulations focus on commercial sales. Always check your local laws, and never sell homemade juice without understanding the regulations that apply to manufacturers.
How much money does DIY vape juice save?
Savings vary, but most mixers spend a fraction per milliliter of what premium pre-made juice costs. The more you vape, the more you save. Initial supply purchases pay for themselves quickly for regular vapers.
Do I need nicotine in DIY vape juice?
No. Many mixers make zero-nicotine juice, either by preference or as part of stepping down. Nicotine is entirely optional.
What is the easiest recipe for a beginner?
A single-fruit mix at a moderate percentage is the simplest start. One concentrate, one base, done. It teaches you measuring, shaking, and steeping without complexity.
Can I use food flavorings from the grocery store?
No. Use only flavor concentrates made specifically for vaping. Grocery extracts may contain oils or other ingredients that do not belong in e-liquid.
How do I know my nicotine strength is right?
If the throat hit feels harsh, your strength may be too high for your device. If you find yourself chain vaping unsatisfied, it may be too low. Adjust in small steps.
Why does my DIY vape juice taste harsh?
Common causes include too much nicotine, too high a flavor percentage, a burnt coil, or a recipe that needs steeping. Change one variable at a time to find the culprit.
How long does DIY vape juice last?
Stored properly, finished juice stays enjoyable for many months. Mixes with nicotine gradually darken. If a bottle smells off or tastes wrong, discard it and mix fresh.
Can I mix DIY vape juice without a scale?
Yes. Syringes and careful volume measurement work fine. A scale is a convenience upgrade, not a requirement.
Where can I buy DIY vape juice supplies?
Reputable vape retailers carry bases, concentrates, bottles, and tools. DiscoverVapes stocks quality mixing supplies, and the team at DiscoverVapes can point you toward beginner-friendly options.
Final Thoughts on DIY Vape Juice
Making DIY vape juice is one of the most rewarding skills a vaper can learn. You gain control over flavor, nicotine, and cost, and you join a creative community that loves to share knowledge. Start simple, respect the safety rules, keep good notes, and be patient with your learning curve.
Your first batch might be humble. Your tenth might be the best juice you have ever vaped. That journey is what DIY vape juice is all about.
Ready to start? Gather your supplies, pick a beginner recipe from this guide, and mix your first bottle this weekend. For a clean neutral base to build on, read our guide to unflavored vape juice. For the regulatory background on e-liquids, the FDA tobacco products page is the authoritative reference.